AdonisJS
Adonis JS - 4. Seeds, Factories
Updated:
In this section, we will be learning about seeds, factories, and how to edit and delete our books.
Seeds & Factories
Seeds & Factories allow us to populate our databases with "dummy" data which makes building and prototyping our application much easier. Let's create a seed and factory to populate our books table with more books.
To create a seed for our books, run the following command:
adonis make:seed Book
This will create a new file database/seeds/BookSeeder.js which looks like:
"use strict";

/*
    |--------------------------------------------------------------------------
    | BookSeeder
    |--------------------------------------------------------------------------
    |
    | Make use of the Factory instance to seed database with dummy data or
    | make use of Lucid models directly.
    |
    */

/** @type {import('@adonisjs/lucid/src/Factory')} */
const Factory = use("Factory");

class BookSeeder {
  async run() {}
}

module.exports = BookSeeder;
We now need to make a factory which will generate our dummy data for our books. Under the hood, Adonis uses Chance.js to generate this dummy data.
Update database/factory.js with the following:
"use strict";

/*
    |--------------------------------------------------------------------------
    | Factory
    |--------------------------------------------------------------------------
    |
    | Factories are used to define blueprints for database tables or Lucid
    | models. Later you can use these blueprints to seed your database
    | with dummy data.
    |
    */

/** @type {import('@adonisjs/lucid/src/Factory')} */
const Factory = use("Factory");

Factory.blueprint("App/Models/Book", (faker) => {
  return {
    title: faker.sentence({ words: 5 }),
    author: faker.name(),
    cover_image:
      "https://ismbook.com/wp-content/uploads/2018/12/best-philosophy-books.jpg",
    isbn: faker.string({ length: 10, numeric: true }),
  };
});
First, we are telling the factory to use our Book model Factory.blueprint("App/Models/Book", (faker) =>
Then we are populating the book properties with dummy data generated by Chance.js.
title: faker.sentence({ words: 5 })- title - is going to be a sentence of 5 random words:author: faker.name(),- author - is going to be a random fake namecover_image: "https://ismbook.com/wp-content/uploads/2018/12/best-philosophy-books.jpg",- is simply a url of an image of some books I found on google. You can replace this with whatever book image you would like.isbn: faker.string({ length: 10, numeric: true }),- isbn - random number which is 10 numbers long.
Now we need to tell our BookSeeder.js file to use this factory. Update it with the following:
"use strict";

/*
    |--------------------------------------------------------------------------
    | BookSeeder
    |--------------------------------------------------------------------------
    |
    | Make use of the Factory instance to seed database with dummy data or
    | make use of Lucid models directly.
    |
    */

/** @type {import('@adonisjs/lucid/src/Factory')} */
const Factory = use("Factory");

class BookSeeder {
  async run() {
    const booksArray = await Factory.model("App/Models/Book").createMany(7);
  }
}

module.exports = BookSeeder;
We are telling the book seeder to use the factory we just created and to create 7 books. Feel free to generate as many or as few books as you would like.
Now run the following command to execute our seeder and generate our books
adonis seed
If all goes well you should see a message like Seeded database in 200ms output into the console. Let's check our database to see our new books. 
Index view
Let's update our book/index.edge view to display all of the properties of our books in a table.
@layout('layouts.default')

@section('content')
  <h1>Books Index</h1>

  @if(old('notification'))
    <div class="alert alert-success">
      {{ old('notification') }}
    </div>
  @endif

  <table class="table">
    <thead>
      <tr>
        <th scope="col">Cover Image</th>
        <th scope="col">Title</th>
        <th scope="col">Author</th>
        <th scope="col">ISBN</th>
      </tr>
    </thead>
    <tbody>
      @each(book in books)
        <tr>
          <td><img src="{{ book.cover_image }}" alt="{{ book.title }}" style="width: 100px;"></td>
          <td scope="row">{{ book.title }}</td>
          <td>{{ book.author }}</td>
          <td>{{ book.isbn }}</td>
        </tr>
      @endeach

    </tbody>
  </table>
@endsection
Next, we need to update our index method to query our books table in the database.
async index({ view }) {
  const books = await Book.all();

  return view.render("book.index", {
    books: books.toJSON(),
  });
}
We are grabbing all of the books and then passing them to our view. We need to use the .toJSON() method when accessing data from our database.
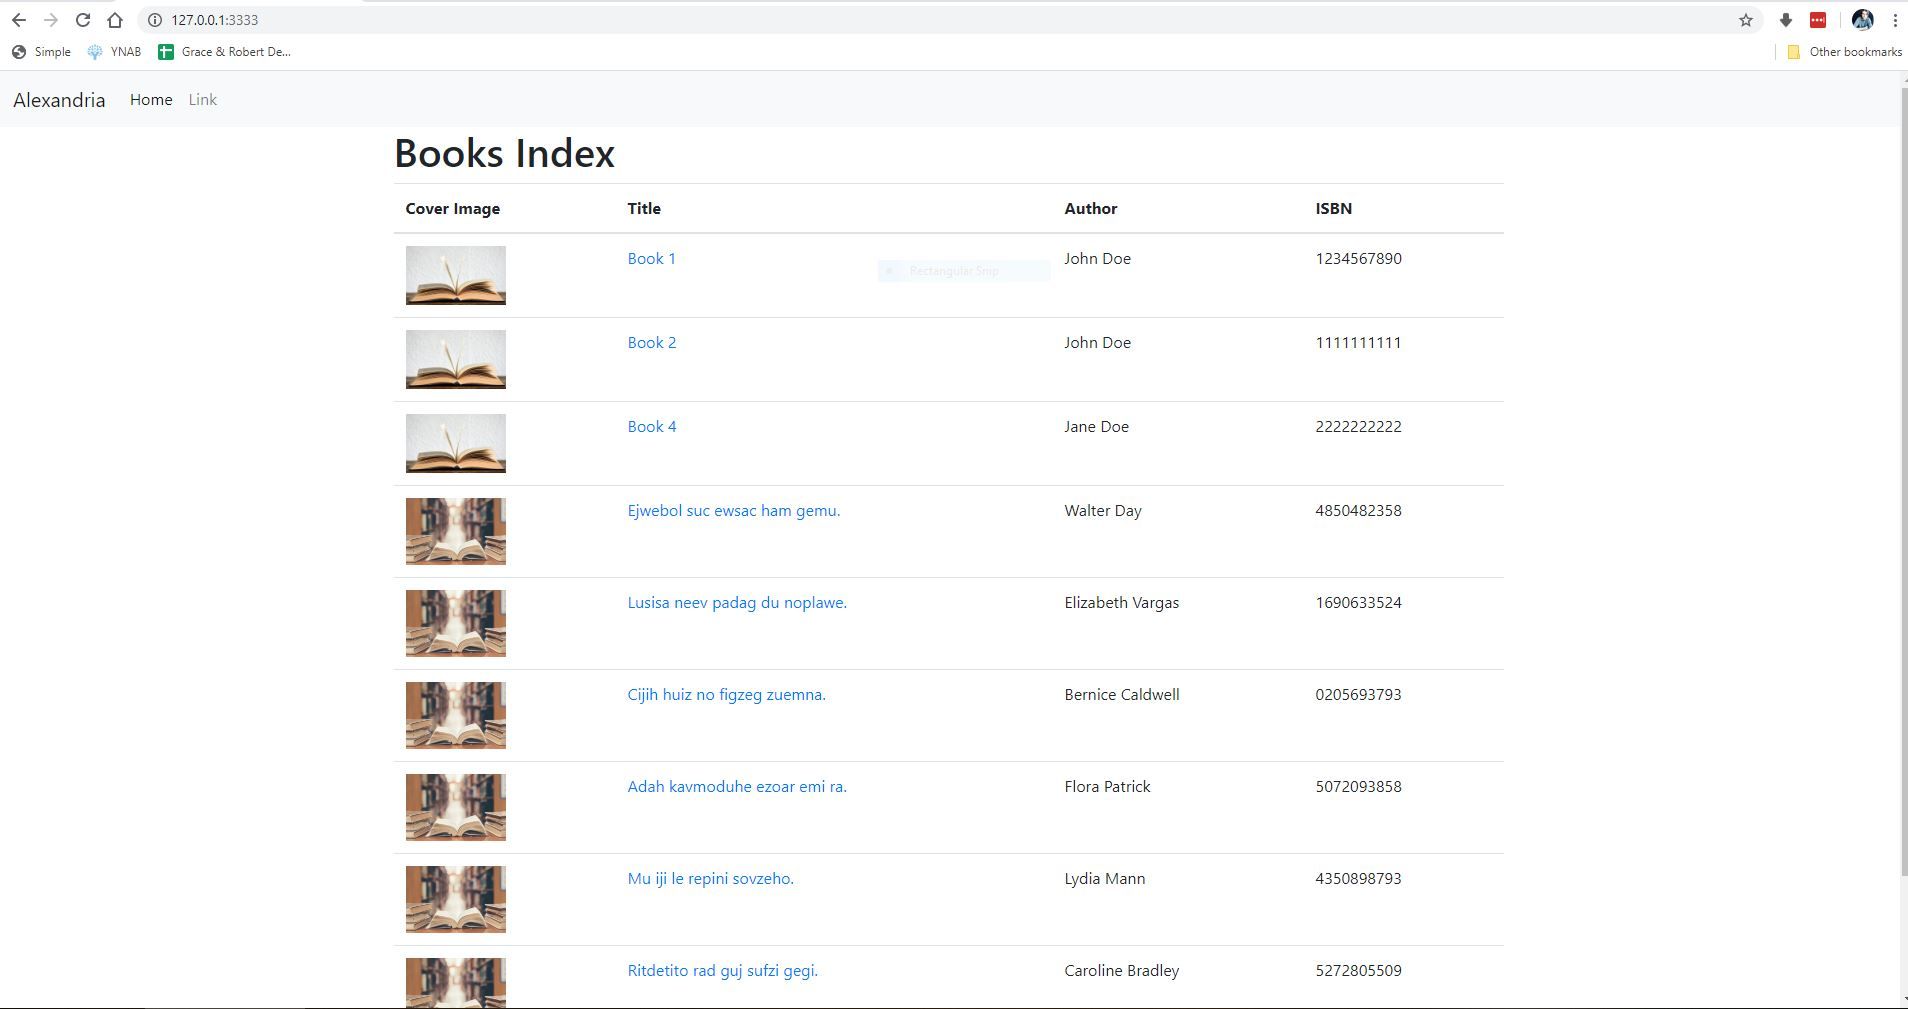
Our home page now looks like this:
Edit Books
Now that we have the ability to create books, we also need to be able to edit them. First, let's create a new route and view to display a single book.
adonis make:view book/show
Within our new show.edge file, add the following:
@layout('layouts.default')

@section('content')
  <table class="table">
    <thead>
      <tr>
        <th scope="col">Cover Image</th>
        <th scope="col">Title</th>
        <th scope="col">Author</th>
        <th scope="col">ISBN</th>
      </tr>
    </thead>
    <tbody>
      <tr>
        <td><img src="{{ book.cover_image }}" alt="{{ book.title }}" style="width: 100px;"></td>
        <th scope="row">{{ book.title }}</th>
        <td>{{ book.author }}</td>
        <td>{{ book.isbn }}</td>
      </tr>
    </tbody>
  </table>
@endsection
Next, add the following route to the bottom of routes.js
Route.get("books/:id", "BookController.show");
The /:id allows us to take data passed into the url and use it in our views. In this case when a user navigates to /books/1 the will be taken to our show.edge view and the book with the id of 1 will be displayed.
To make viewing each book easier, without having to know the book id, we will update our homepage so that clicking on a book will take you to the books show view.
Updated book/index.edge with the following:
@layout('layouts.default')

@section('content')
  <h1>Books Index</h1>

  @if(old('notification'))
    <div class="alert alert-success">
      {{ old('notification') }}
    </div>
  @endif

  <table class="table">
    <thead>
      <tr>
        <th scope="col">Cover Image</th>
        <th scope="col">Title</th>
        <th scope="col">Author</th>
        <th scope="col">ISBN</th>
      </tr>
    </thead>
    <tbody>
      @each(book in books)
        <tr>
          <td><a href="/books/{{ book.id }}"><img src="{{ book.cover_image }}" alt="{{ book.title }}" style="width: 100px;"></a></td>
          <td scope="row"><a href="/books/{{ book.id }}">{{ book.title }}</a></td>
          <td>{{ book.author }}</td>
          <td>{{ book.isbn }}</td>
        </tr>
      @endeach

    </tbody>
  </table>
@endsection
We have added links for both the cover image and book title, so that clicking on either of them will take the user to the show view.
Now let's update our controller with a new show() method.
async show({ params, view }) {
  const book = await Book.find(params.id);

  return view.render("book.show", {
    book,
  });
}
In this new method, we are looking up a particular Book by using Book.find(params.id). The params.id is the id that gets passed into the URL, which we are grabbing from our route with Route.get("books/:id", "BookController.show"). /:id becomes params.id
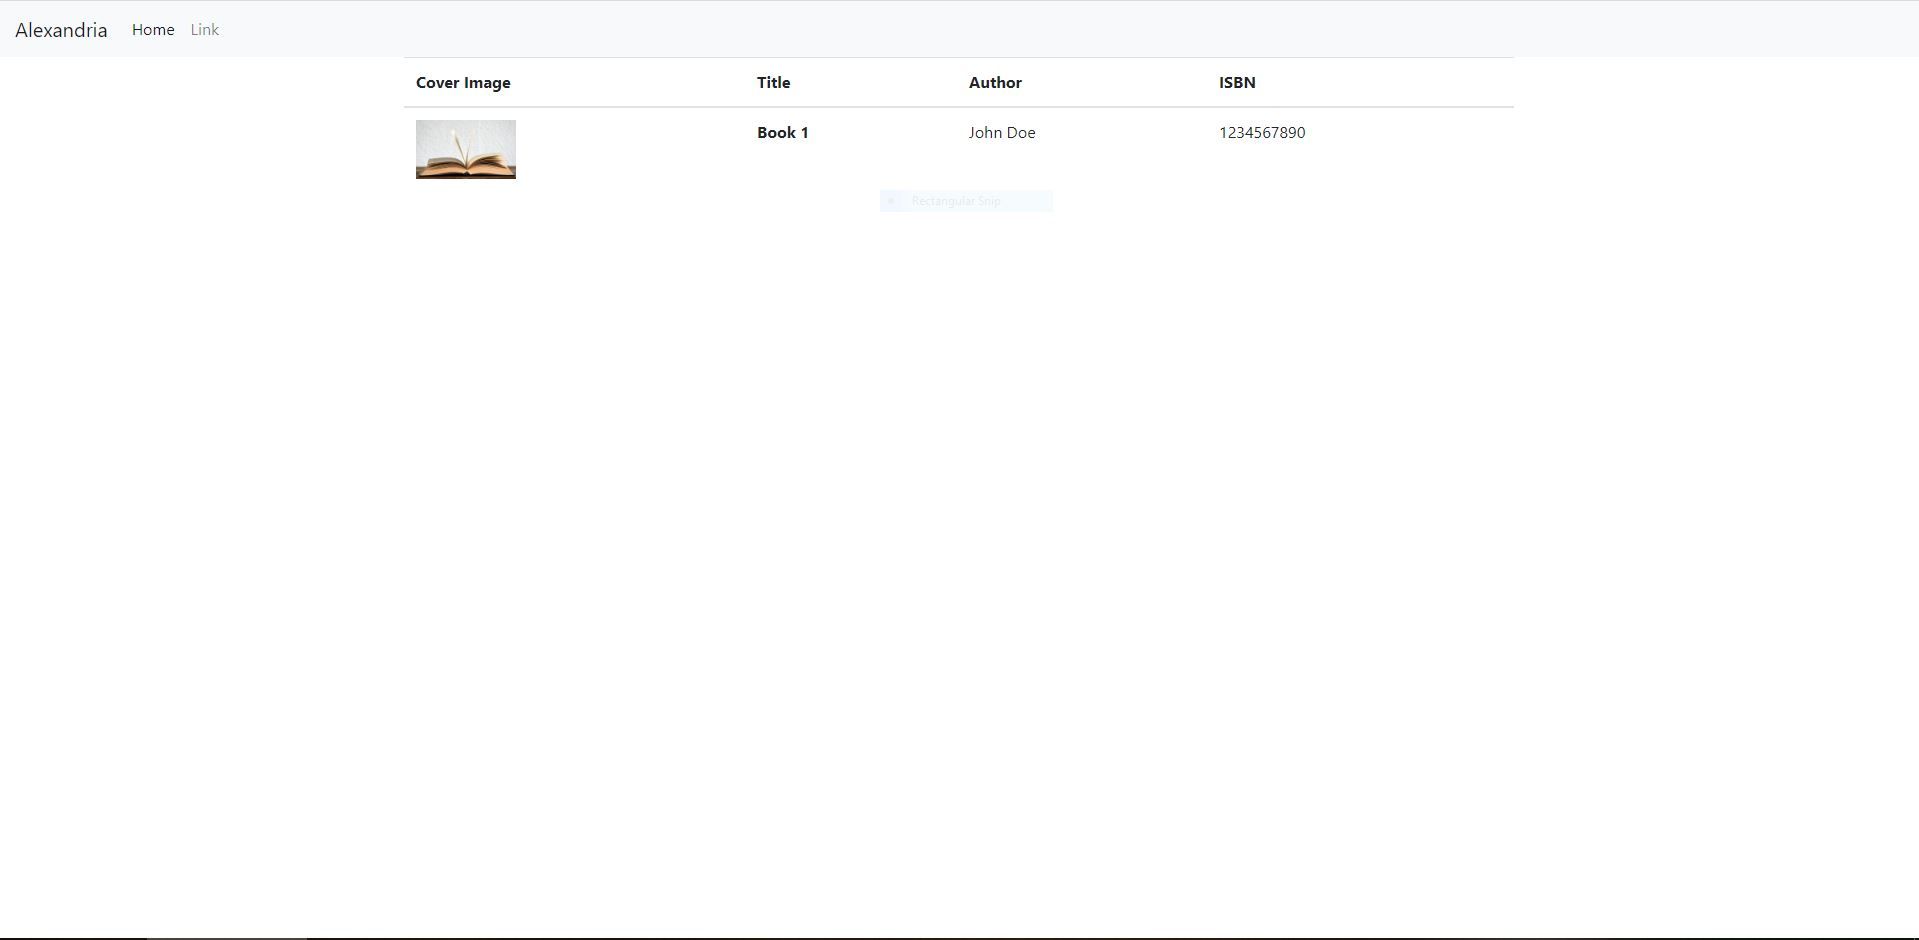
Now if we click on the cover image or title we should be taken to the show view, which looks like this:
Let's add an edit button to this view, which we will then create the appropriate view, route & controller methods for.
Update show.edge with the following:
@layout('layouts.default')

@section('content')
  <table class="table">
    <thead>
      <tr>
        <th scope="col">Cover Image</th>
        <th scope="col">Title</th>
        <th scope="col">Author</th>
        <th scope="col">ISBN</th>
      </tr>
    </thead>
    <tbody>
      <tr>
        <td><img src="{{ book.cover_image }}" alt="{{ book.title }}" style="width: 100px;"></td>
        <th scope="row">{{ book.title }}</th>
        <td>{{ book.author }}</td>
        <td>{{ book.isbn }}</td>
      </tr>
    </tbody>
  </table>

  <hr>
  <a href="/books/{{ book.id }}/edit" class="btn btn-dark d-block float-left">Edit Book</a>
@endsection
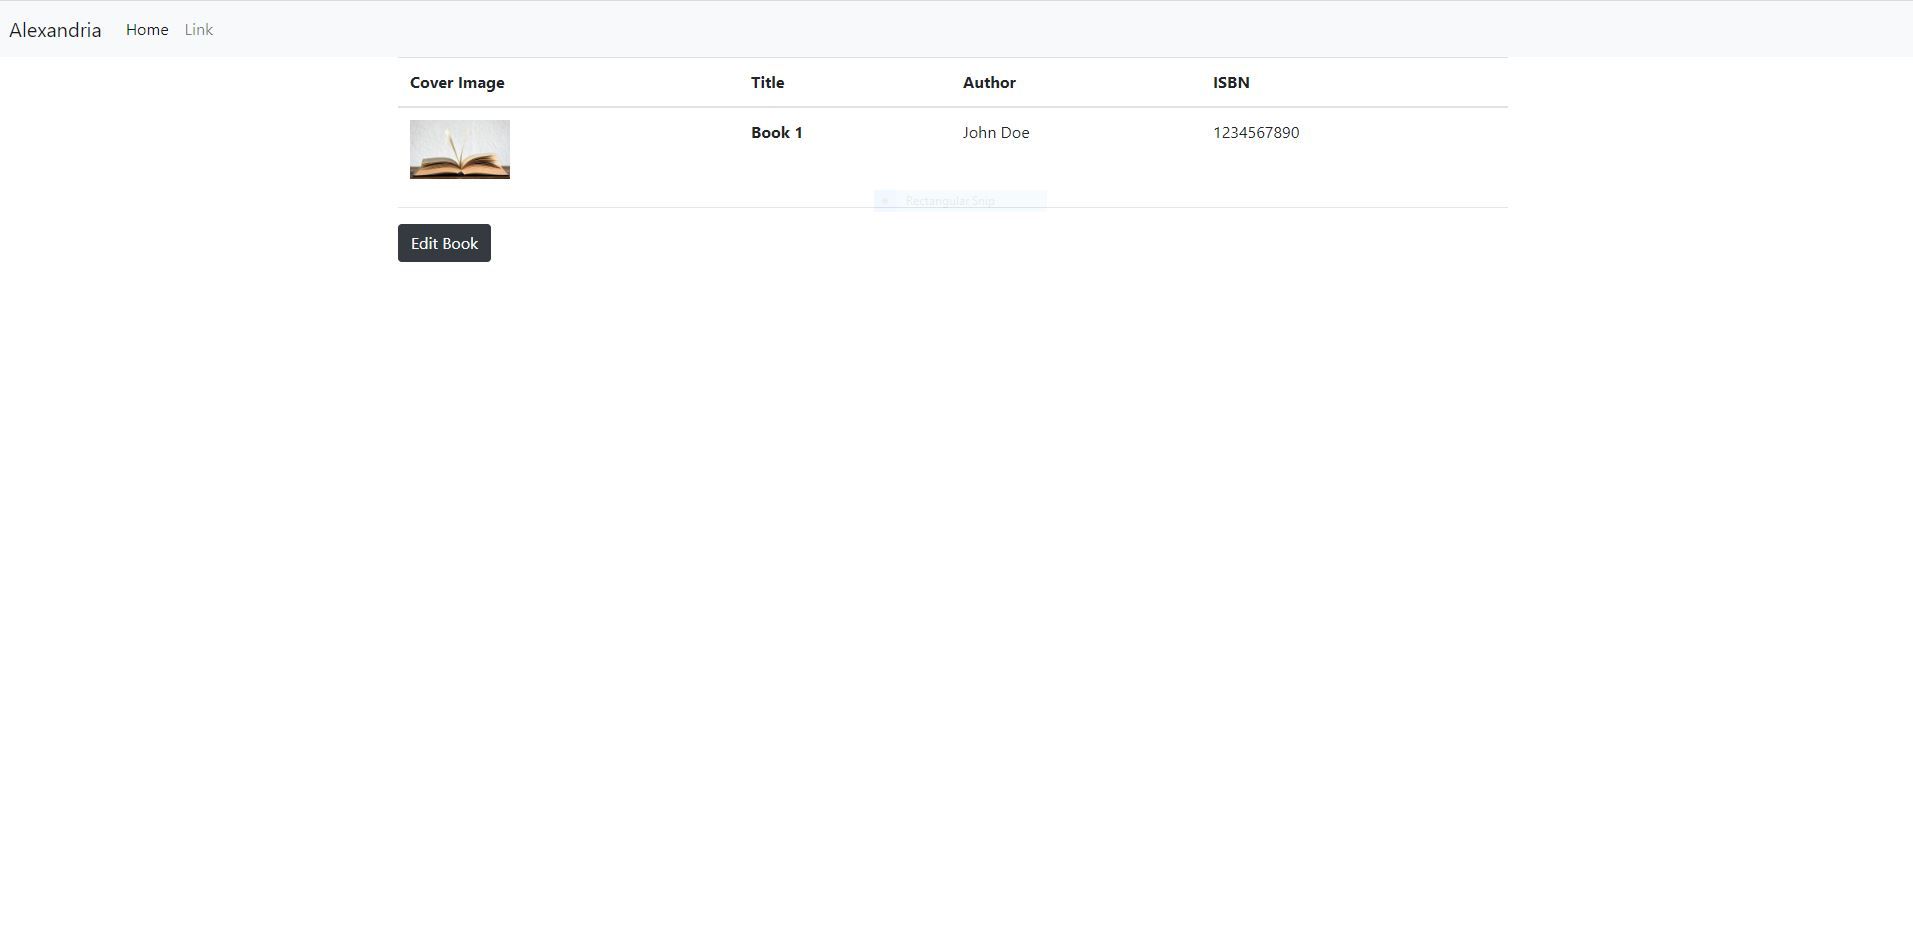
Our show view now looks like:
Next, we need to create a new route to match the buttons URL /books/{{ book.id }}/edit
Update routes.js with the following:
"use strict";

/*
    |--------------------------------------------------------------------------
    | Routes
    |--------------------------------------------------------------------------
    |
    | Http routes are entry points to your web application. You can create
    | routes for different URL's and bind Controller actions to them.
    |
    | A complete guide on routing is available here.
    | http://adonisjs.com/docs/4.1/routing
    |
    */

/** @type {typeof import('@adonisjs/framework/src/Route/Manager')} */
const Route = use("Route");

// Route.on("/").render("welcome");
Route.get("/", "BookController.index");
Route.get("books/create", "BookController.create");
Route.post("books", "BookController.store");
Route.get("books/:id", "BookController.show");
Route.get("/books/:id/edit", "BookController.edit");
Now we need to create an edit() method on our controller.
async edit({ params, view }) {
  const book = await Book.find(params.id);

  return view.render("book.edit", {
    book,
  });
}
It looks almost identical to our show() method. The only difference is it is rendering a new edit view. Which we need to create.
adonis make:view book/edit
Within edit.edge add the following:
@layout('layouts.default')

@section('content')
  <h1>Edit {{ book.title }}</h1>

  <form>
    {{ csrfField() }}

    <div class="form-group">
      <label for="">Title</label>
      <input type="text" name="title" class="form-control" value="{{ book.title }}">
    </div>

    <div class="form-group">
      <label for="">Author</label>
      <input type="text" name="author" class="form-control" value="{{ book.author }}">
    </div>

    <div class="form-group">
      <label for="">Cover Image</label>
      <input type="text" name="cover_image" class="form-control" placeholder="image URL" value="{{ book.cover_image }}">
    </div>

    <div class="form-group">
      <label for="">ISBN</label>
      <input type="text" name="isbn" class="form-control" value="{{ book.isbn }}">
    </div>

    <input type="submit" value="Submit" class="btn btn-primary">
  </form>
@endsection
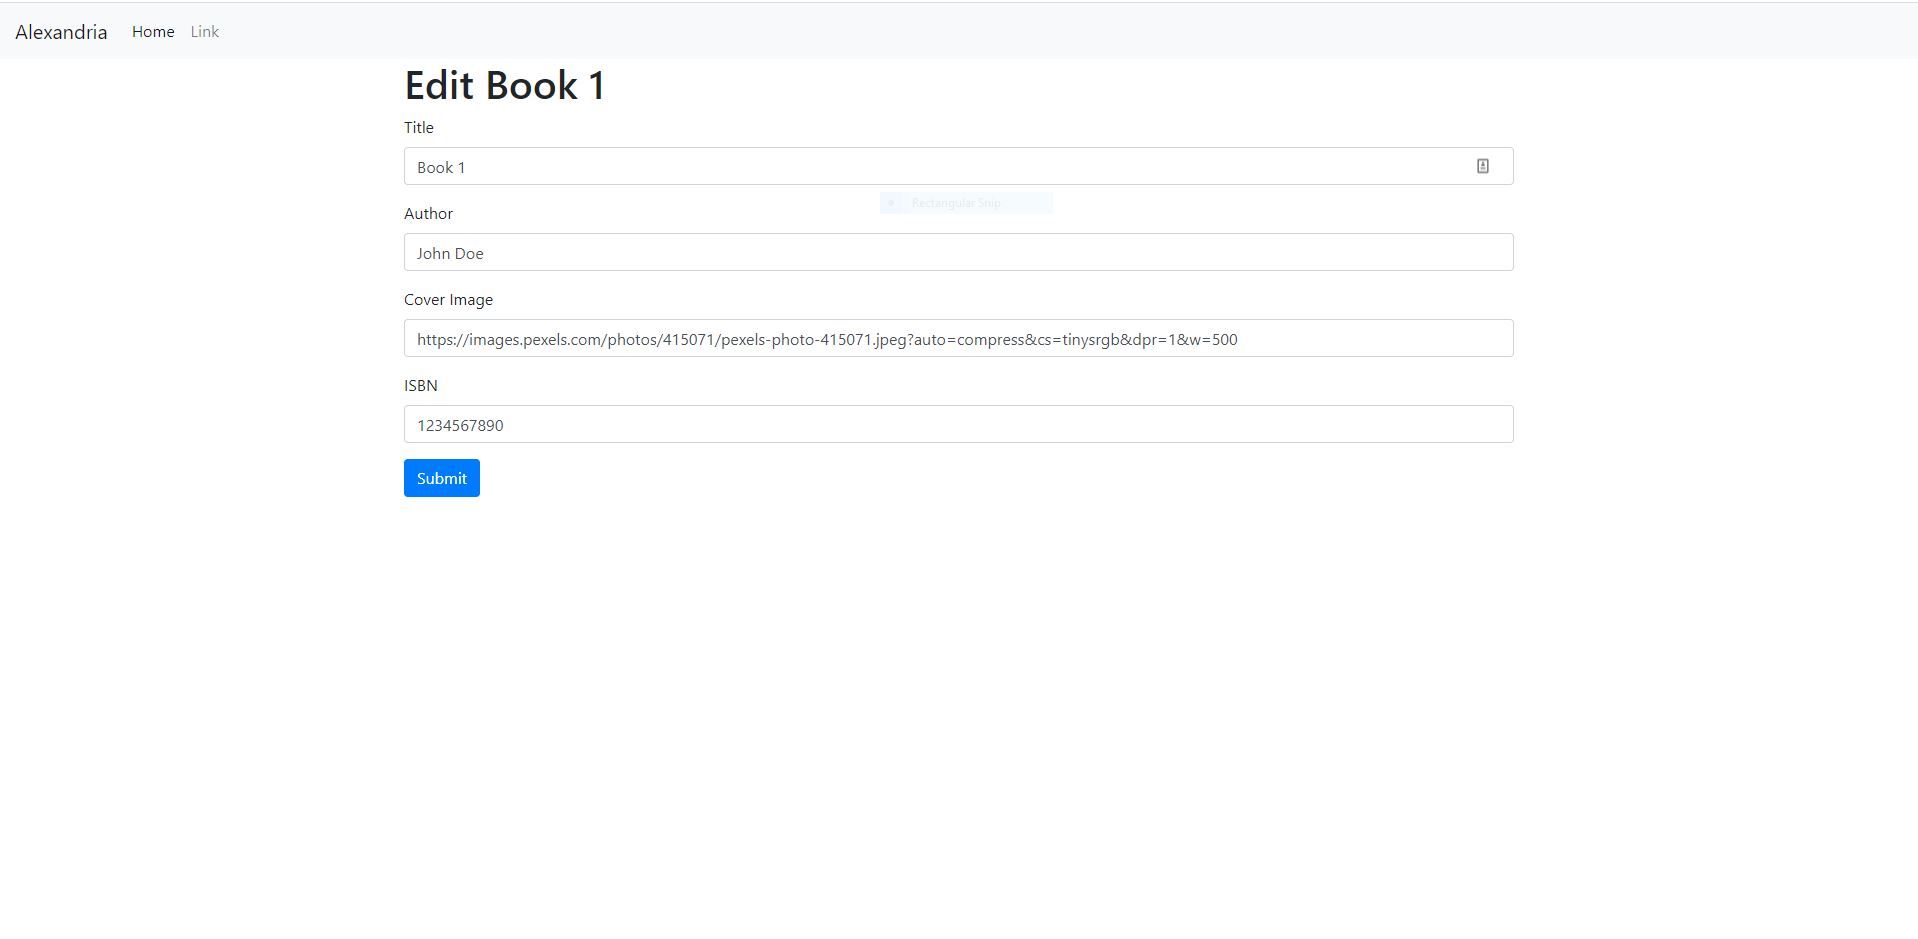
Now if you click on the edit book for any book you should see the following:
The form should look just like our form to create a new book, however, each field will be pre-populated with the books data.
We can now makes edits to our book. However, if we click the submit button, nothing is going to happen. We need to create a new route and method to update() our edits.
Update routes.js with the following:
"use strict";

/*
    |--------------------------------------------------------------------------
    | Routes
    |--------------------------------------------------------------------------
    |
    | Http routes are entry points to your web application. You can create
    | routes for different URL's and bind Controller actions to them.
    |
    | A complete guide on routing is available here.
    | http://adonisjs.com/docs/4.1/routing
    |
    */

/** @type {typeof import('@adonisjs/framework/src/Route/Manager')} */
const Route = use("Route");

// Route.on("/").render("welcome");
Route.get("/", "BookController.index");
Route.get("books/create", "BookController.create");
Route.post("books", "BookController.store");
Route.get("books/:id", "BookController.show");
Route.get("/books/:id/edit", "BookController.edit");
Route.put("/books/:id", "BookController.update");
Now let's create our update() on our controller.
async update({ params, request, response, session }) {
  const book = await Book.find(params.id);

  book.title: request.input("title");
  book.author = request.input("author");
  book.cover_image = request.input("cover_image");
  book.isbn = request.input("isbn");

  await book.save();

  session.flash({ notification: "Book Updated" });

  return response.redirect("/");
}
Finally, we need to update our edit.edge form action to submit to our new route.
Update edit.edge with the following:
@layout('layouts.default')

@section('content')
  <h1>Edit {{ book.title }}</h1>

  <form action="/books/{{ book.id }}?_method=PUT" method="POST">
    {{ csrfField() }}

    <div class="form-group">
      <label for="">Title</label>
      <input type="text" name="title" class="form-control" value="{{ book.title }}">
    </div>

    <div class="form-group">
      <label for="">Author</label>
      <input type="text" name="author" class="form-control" value="{{ book.author }}">
    </div>

    <div class="form-group">
      <label for="">Cover Image</label>
      <input type="text" name="cover_image" class="form-control" placeholder="image URL" value="{{ book.cover_image }}">
    </div>

    <div class="form-group">
      <label for="">ISBN</label>
      <input type="text" name="isbn" class="form-control" value="{{ book.isbn }}">
    </div>

    <input type="submit" value="Submit" class="btn btn-primary">
  </form>
@endsection
You may be wondering what this odd syntax is in our form action:
<form action="/books/{{ book.id }}?_method=PUT" method="POST"></form>
Adonis calls this Method Spoofing which makes it very easy for our forms to make PUT requests, since HTML forms can only make GET & POST requests.
Let's alter some of the data in our form and see if our changes are being persisted in our database.
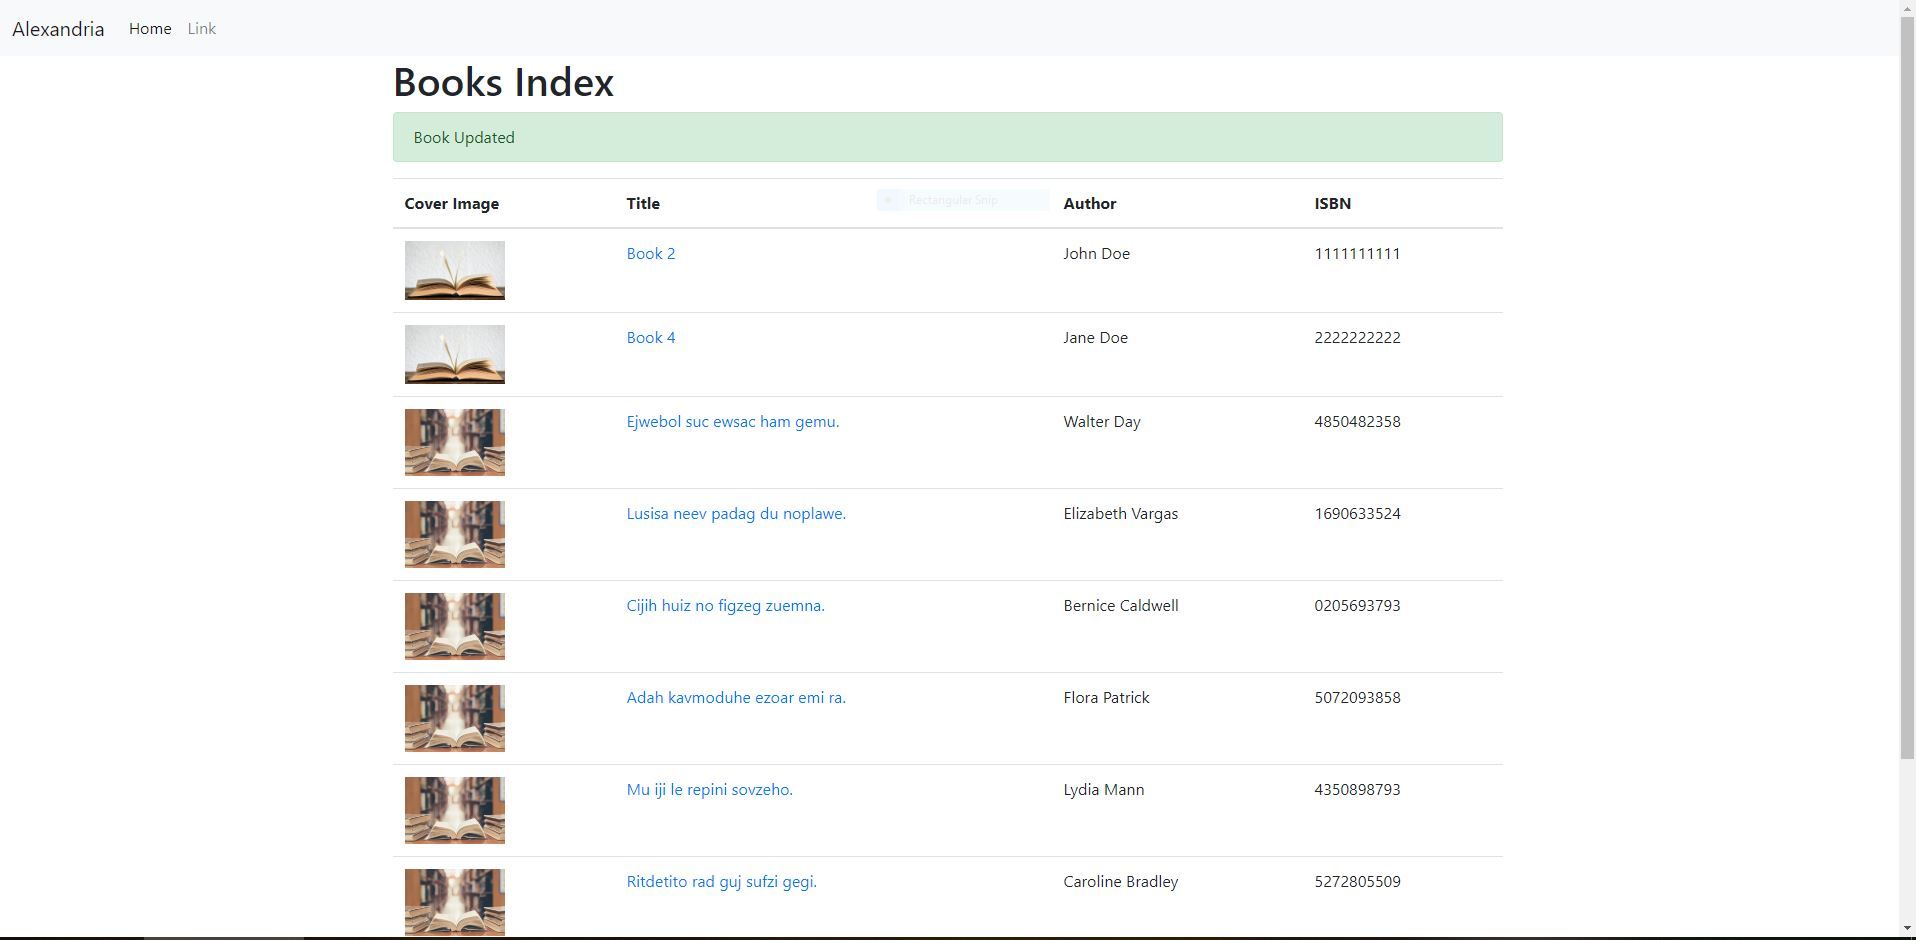
If you see the flash message with "Book updated" everything should be working and you should see your edited book on the home page with your new information.
Challenge: Add validation to the edit.edge view and the update() method. Take a look at how we are doing this for our create.edge and store() method.
Delete Books
Finally we need the ability to delete a book from our database. This will be much easier than our edit functionality.
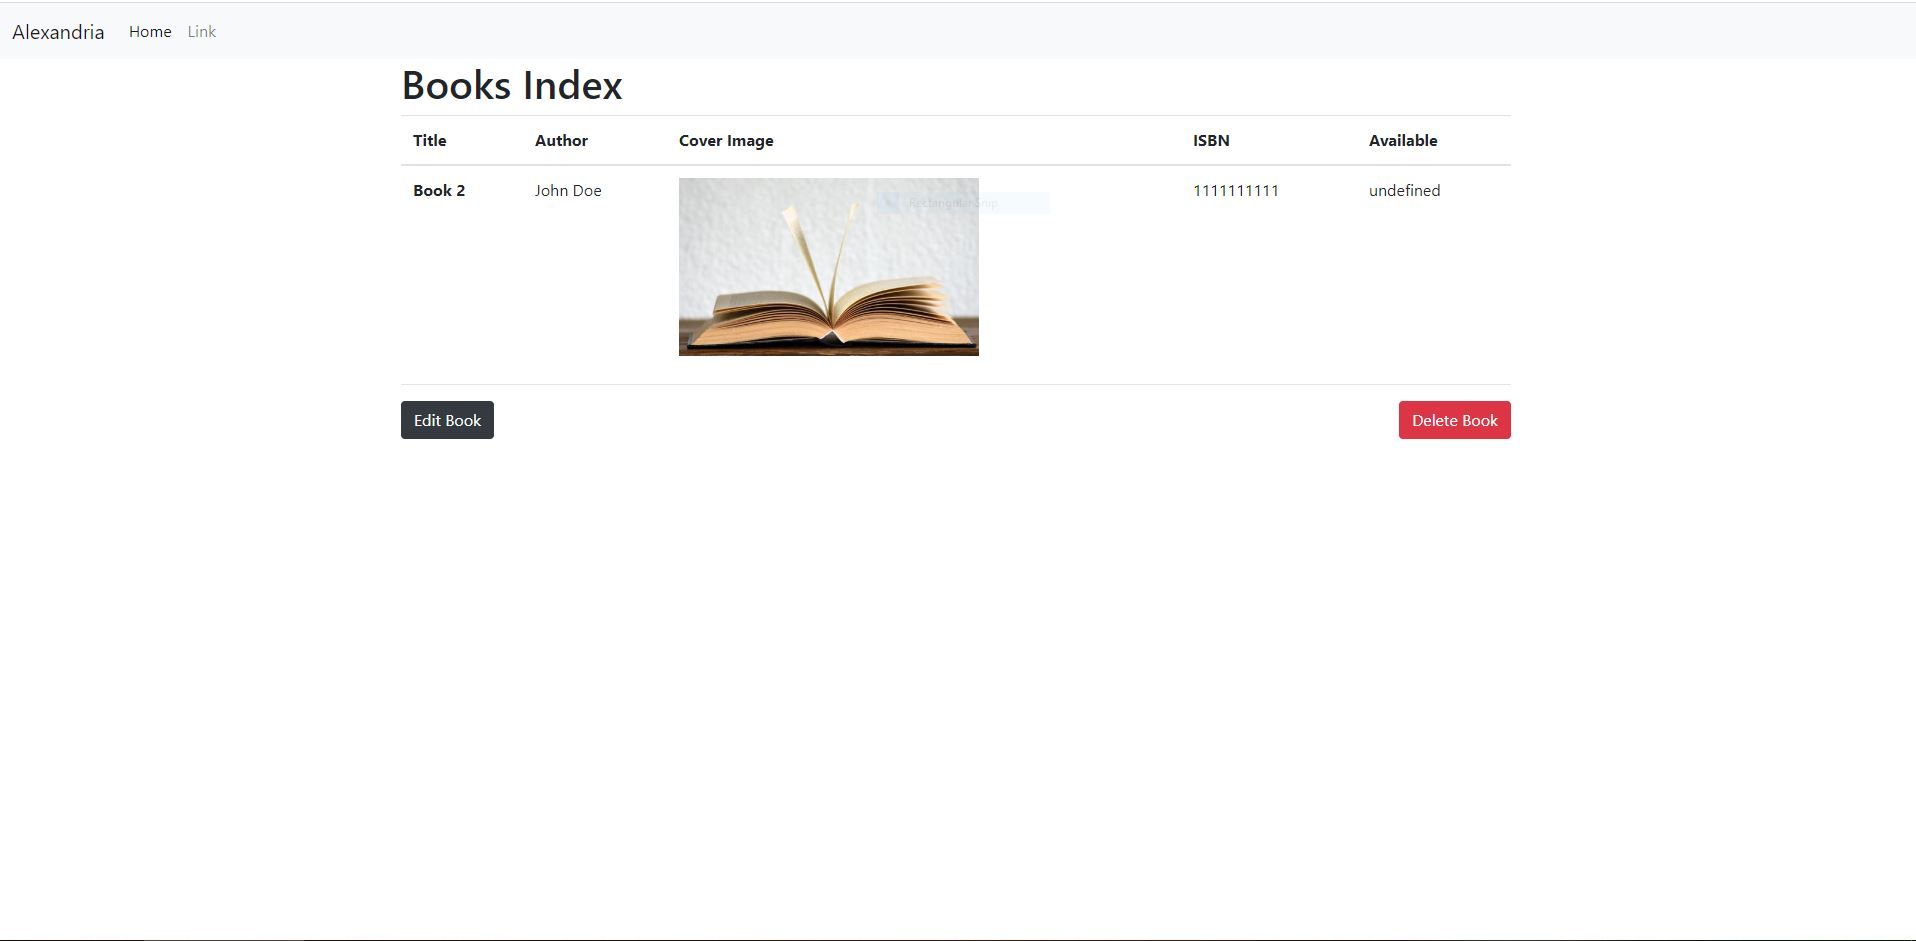
First, let's add a delete button to our show.edge view.
@layout('layouts.default')

@section('content')
  <h1>Books Index</h1>

  <table class="table">
    <thead>
      <tr>
        <th scope="col">Title</th>
        <th scope="col">Author</th>
        <th scope="col">Cover Image</th>
        <th scope="col">ISBN</th>
        <th scope="col">Available</th>
      </tr>
    </thead>
    <tbody>
      <tr>
        <th scope="row">{{ book.title }}</th>
        <td>{{ book.author }}</td>
        <td><img src="{{ book.cover_image }}" alt="{{ book.title }}" style="width: 300px;"></td>
        <td>{{ book.isbn }}</td>
        <td>{{ book.available }}</td>
      </tr>
    </tbody>
  </table>

  <hr>
  <a href="/books/{{ book.id }}/edit" class="btn btn-dark d-block float-left">Edit Book</a>

  <form action="/books/{{ book.id }}?_method=DELETE" method="POST">
    {{ csrfField() }}

    <input type="submit" class="btn btn-danger d-block float-right" value="Delete Book">
  </form>
@endsection
Notice that for our Delete button we are nesting it inside of a form, that adds method spoofing for the DELETE request.
Next, let's create our delete route.
Within routes.js add the following:
"use strict";

/*
    |--------------------------------------------------------------------------
    | Routes
    |--------------------------------------------------------------------------
    |
    | Http routes are entry points to your web application. You can create
    | routes for different URL's and bind Controller actions to them.
    |
    | A complete guide on routing is available here.
    | http://adonisjs.com/docs/4.1/routing
    |
    */

/** @type {typeof import('@adonisjs/framework/src/Route/Manager')} */
const Route = use("Route");

// Route.on("/").render("welcome");
Route.get("/", "BookController.index");
Route.get("books/create", "BookController.create");
Route.post("books", "BookController.store");
Route.get("books/:id", "BookController.show");
Route.get("/books/:id/edit", "BookController.edit");
Route.put("/books/:id", "BookController.update");
Route.delete("/books/:id", "BookController.destroy");
Now let's create this new destroy() method on our controller.
async destroy({ params, session, response }) {
  const book = await Book.find(params.id);

  await book.delete();

  session.flash({ notification: "Book Deleted" });

  return response.redirect("/");
}
Our entire Book Controller should look like this:
"use strict";

const Book = use("App/Models/Book");
const { validate } = use("Validator");

class BookController {
  async index({ view }) {
    const books = await Book.all();

    return view.render("book.index", {
      books: books.toJSON(),
    });
  }

  async create({ view }) {
    return view.render("book.create");
  }

  async store({ request, response, session }) {
    const validation = await validate(request.all(), {
      title: "required",
      author: "required",
      cover_image: "required",
      isbn: "required|min:10|max:10",
    });

    if (validation.fails()) {
      session.withErrors(validation.messages()).flashAll();
      return response.redirect("back");
    }

    const book = new Book();

    book.title: request.input("title");
    book.author = request.input("author");
    book.cover_image = request.input("cover_image");
    book.isbn = request.input("isbn");

    await book.save();

    session.flash({ notification: "Book Created" });
    return response.redirect("/");
  }

  async show({ params, view }) {
    const book = await Book.find(params.id);

    return view.render("book.show", {
      book,
    });
  }

  async edit({ params, view }) {
    const book = await Book.find(params.id);

    return view.render("book.edit", {
      book,
    });
  }

  async update({ params, request, response, session }) {
    const book = await Book.find(params.id);

    book.title: request.input("title");
    book.author = request.input("author");
    book.cover_image = request.input("cover_image");
    book.isbn = request.input("isbn");

    await book.save();

    session.flash({ notification: "Book Updated" });

    return response.redirect("/");
  }

  async destroy({ params, session, response }) {
    const book = await Book.find(params.id);

    await book.delete();

    session.flash({ notification: "Book Deleted" });

    return response.redirect("/");
  }
}

module.exports = BookController;
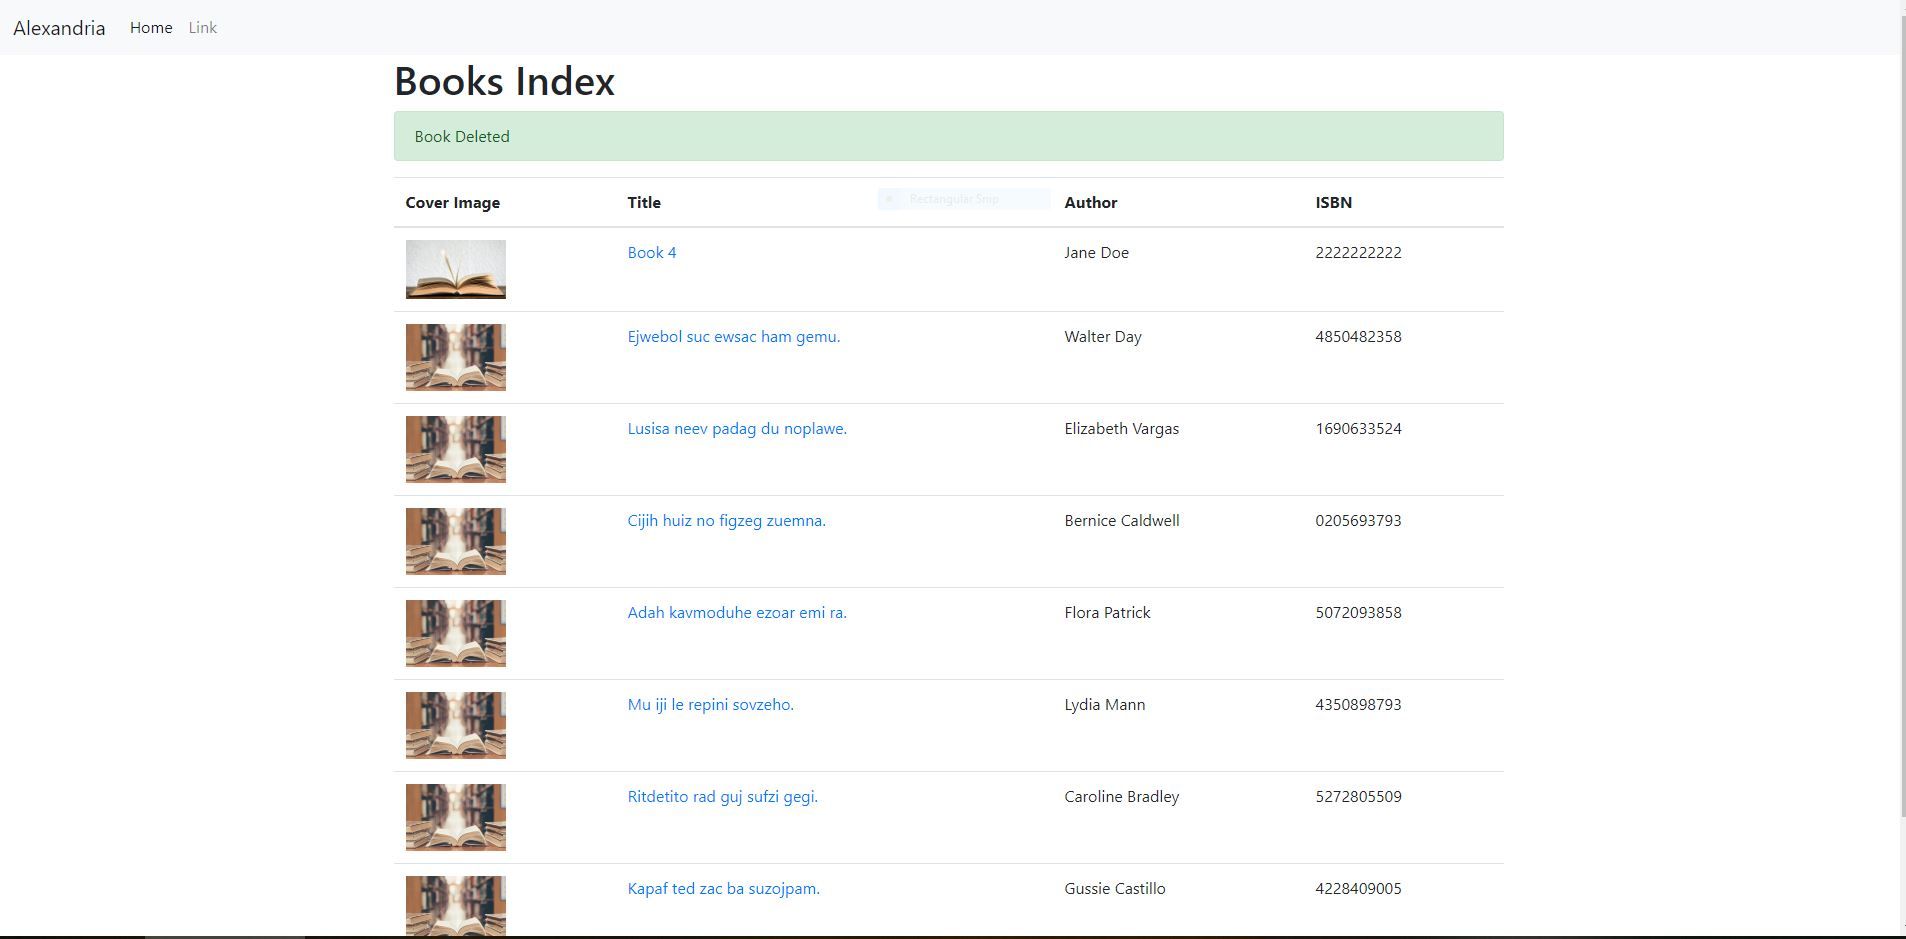
Let's try to delete a book and make sure everything is working properly.
You should see the "Book Deleted" and the book should no longer be displayed on the homepage.
Repo
The code for this section can be found in the repo under the branch 4-seeds-factories-edit-delete.
Wrap Up
In this section we learned how to create seeds and factories to populate our database with dummy data and how to edit and delete books.
